Saturday, July 14, 2012

Gazebo to Greenhouse: Roofing

The roof of the greenhouse is made of Solexx XP paneling.  Note, the roof elevator frame is removed.  This is a piece of metal framing on some gazebos that allows dual layer canvas roofing that provides air venting.  With this removed the roof frame is a single level, though I had 4 protrusions from the elevator frame.  I tried turning one of the original roof frames upside down so the protrusions wouldn't get in the way of the paneling, but the frame is not suited for that.  I got one to work, and just left it.

The paneling is cut to appropriate lengths and then placed on top of the metal frame roof.  Some geometric planning, and careful measurement is required here for a minimally seamed solution.  I allowed for spaces between my seams and covered them with pool covering insulation.  The XP panels I used are dual pane with an air insulator pocket in between. These are stiff enough that they can be attached to the metal greenhouse frame with zip ties.

The insulation I used for the seams proved to not be very UV resistant, so I am updating the seams with the UV greenhouse plastic used for the upper walls.


Other posts in this series:
Pictures More Pictures
Start
Insulating and Doorway
Upper Walls
Door
Roofing

Gazebo to Greenhouse: Update: door

On an earlier post you saw the framing of the door for the greenhouse.  Here is a picture of the finished door.

This is wrapped in pool insulating plastic which is actually not very UV tolerant, but it works fine for the door.  There is an interesting point I would like to make.  The greenhouse is really framed on the lower half with about 3/4" foam.  


The door is just plastic wrap.  I have racoons and opossums in my neighbourhood -- not many but they are here.  For some reason they don't bother trying to get through the foam -- maybe it's the foil cover on the outside? Don't know. They can obviously smell the slight fishy water that is in the greenhouse.  Well after about 8 months I did have infiltration of the greenhouse -- through the door -- they scraped back the plastic cover on the bottom and walked right in at night.  Only damage thankfully was rummaging through one of my planter bins for snails -- the creature did not attempt to get into my covered fish tank.


I put some of the insulating foam on the lower half of the door to dissuade the critters, and just for insurance also attached 1/4" wood on the outside bottom of the door -- that has kept the kritters away.


The door uses a gate latch system.


An update picture is shown here also of my 2012 tomatoe and Cee Gwa (both started from seed directly in this bin -- this is the seed starter bin).


Other posts in this series:
Pictures More Pictures
Start
Insulating and Doorway
Upper Walls
Door
Roofing

Monday, July 9, 2012

Gazebo to Greenhouse: Upper Walls

This is the third installment of the greenhouse creation from my gazebo frame.  At this point we have a doorway and insulated lower walls.  The upper walls will be made with greenhouse plastic (UV stabilized clear plastic).

The upper walls are constructed by screwing 1" x 0.5" strapping to the top horizontal metal bar of the gazebo.  The upper "walls" are actually curtains made from 4 year greenhouse film cut to be just longer than the upper half of the greenhouse.  The film is treated with a bead of silicone glue then stapled to the wood strapping with a strip of heavy cloth material. I used 1" tow straps bought at a surplus store for the "heavy material".  Put a UV resistant length of rope at the center of each curtain so you can tie the "wall" open during summer months.


In order to anchor the sides of the walls, I screwed lengths of "Snap Clamp" material along the side.  The clamps were screwed either into the wooded door frame or metal sides of the gazebo.  The clamps work by allowing you to sandwich the film between the clamps and short lengths of 3/4" PVC pipe.


I purchased to Greenhouse film (20ft wide x 25ft long) and (10) 48" lengths of snap clamps from www.greenhousemegastore.com.  I also  purchased 33 linear feet of Solexx XP for the roofing material as part of the same purchase.  Total including shipping was $403.37.


Other posts in this series:
Pictures More Pictures
Start
Insulating and Doorway
Upper Walls
Door
Roofing

Power Failure Tolerant Air for Aquaponics Fish

I run two high capacity air pumps for my aquaponics fish tanks and grow beds (some of my beds I pump air into).  These are 110v air pumps.  They will run off a large car battery and inverter for about 36 hours.

To make the system tolerant of power failures I do the following:


  1. Power a battery trickle charger from mains 110v -- this can supply the 60-90W required for the air pumps.
  2. connect the battery to a 150W inverter
  3. power the air pumps from the inverter
Now the battery is maintained at full charge while my mains power is on (99%+ of the time).  Should I have a power failure for a storm or other reason, the battery would still power the air pumps for more than a day. My water starts getting messed up if the water pump doesn't run for a day, so this is about the time I would have to take other steps.


Second Year Tomatoes and Green Peppers

I overwintered one tomato plant and all my bell pepper plants in the aquaponics greenhouse.  This is what they looked like in May of this year (more than 12 months old).  I wasn't certain in May if the tomatoes would set fruit.  They had plenty of flowers but no fruits.


I am not actually sure if the tomato didn't eat any visitors to my greenhouse (just kidding) :-).  That is one plant.

This last weekend I harvested about 40% of the bell peppers (all the red ones, and many larger green ones). While trimming back the tomato plant I also noticed that it had set some fruit.


The smaller peppers were perfect for BBQ skewers.

Conclusion, yes overwintered tomatoes and bell peppers will yield.  The bells are yielding very well. It will remain to see at years end if the tomato yields well.  The tomato plant is certainly very healthy and is a good anchor for my water filtering needs.

Converting Outdoor Transformer Lighting to Solar (p1)

I use 3x 18W lights to decorate my front yard.  This is a total of 4.5A at 12v.  During a recent visit to Anchor Electronics (www.anchor-electronics.com) I found blade style LED high power LED lamp assemblies.  These lamps are built on a PCB consisting of 6 LEDs, a discrete rectifier (to prevent polarity on connection), and a power management chip.  My immediate thought was to convert my 18W lamps to this LED lamp.  Each lamp uses 20mA.  So in total my yard lighting would be 60mA instead of 4.5A.  This is more supportable with a battery backed solar setup.

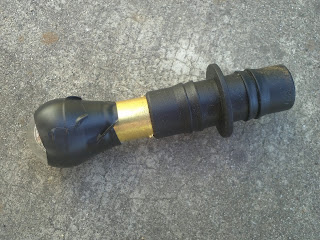
I started the experiment of determining if this would work by converting one burned out bulb to take this lamp.  The following pictures show the steps but read the end instead of following this.  First I taped up most of the glass of the bulb.  Using a plastic wrap I made a base to hammer the bulb to break the top of the glass (without the base, the actual base of the bulb would get damaged).  Next I uncrimped the tungsten and crimped on the pigtails of the LED lamp holder.  I solder gobbed the crimp connection (I believe in belts and suspenders for my electrical connections).  I had o solder gob instead of solder because the tungsten carrier is not easily soldered to.  Finally I filled in the space in the lamp with non-conducting plumbers putty. Installed the LED lamp and fired away.  OK, it took more debugging to get this to work as it turned out that pushing the LED lamp completely into the holder shorted the diodes and prevented operation -- so the LED lamp assembly needs to be pushed in but not all the way.


As it turns out this worked very well.  The 20mA unit was about 75% (qualitative) as bright as the 18W incandescent bulb.

If you want to do something like this, an easier way would be to source the parts from:
http://stores.ebay.com/Auto-Gangster-2009?_trksid=p4340.l2563  -- i ordered parts from here
http://stores.ebay.com/id=1007915828    -- have not ordered from here
http://www.superbrightleds.com/  -- have not ordered from here

After I get my COTS lamps, I will work on converting the transformer system into a solar powered setup instead of mains powered.  Stay tuned.