Tuesday, November 22, 2011
Gazebo to Greenhouse: Insulating and doorway
I am going to describe the steps and techniques I used for the conversion. As usual, if you want more details or explanations on certain items just drop me an email.
The first step is ensuring the gazebo framework is solid. My frame was already bolted down to a concrete slab using the screw holes as part of the frame. So my first step was to go around and using "liquid nails" adhesive to solidify any portions of the frame metal that had rust holes. The rust I had to deal with was very minimal and limited to one side so the frame was still very solid.
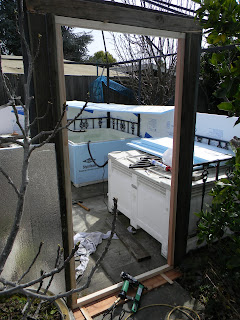
Second I chose one of the entryways to the gazebo to my doorway. I shored this up with 2x4 pressure treated lumber on the side. This was put in such that it was tight so that there was tension on the frame. It was also screwed into the metal framework. The picture also shows the 2x2 framing (light colored wood) in place that would become my door. The purpose of using wood was to strengthen the frame to be used as door frame, and also to provide wood to screw the door hinges into. From this picture you can see that the gazebo top "second story" canvas frame has been removed to allow a smooth roof install later.
Third, I used 1/2" foam insulation on the lower 4 foot of the frame. This went all the way around except of course the chosen doorway. This material has a foil layer on one side and this was placed facing outside. The material was attached to the frame by twist ties, and I also used liquid nails adhesive from the foam to the metal framework. Note that to prevent the twist ties from being pulled through the foam, some form of stop has to be used to apply pressure on the twist tie on the outside. I used pieces of scrap plastic and also 1/2" irrigation hose for this purpose.
Other posts in this series:
Pictures More Pictures
Start (this page)
Insulating and Doorway
Upper Walls
Door
Roofing
Subscribe to:
Post Comments (Atom)


No comments:
Post a Comment